
DIY Haldi Decoration at Home
Planning a Haldi ceremony doesn’t mean you need a massive budget or professional decorators. If you’re aiming for a beautiful and memorable setup, you can easily create a stunning Haldi Decoration in Khatauli right at home with simple ideas and a bit of creativity. The charm of DIY decoration lies in personalization—it reflects your style, your vibe, and your story.
Let’s break down how you can design a Haldi setup that actually looks premium, without wasting money or overcomplicating things.
Haldi Decoration in Khatauli – Simple Home Setup Ideas
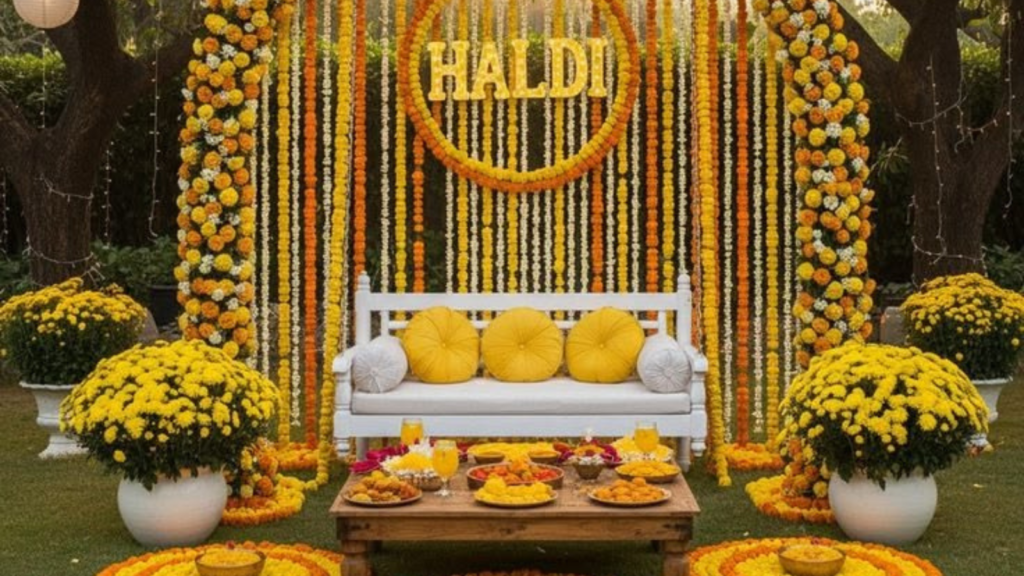
Start with the basics: space and color. Your Haldi ceremony should feel bright, fresh, and festive. Yellow is the obvious theme, but if you overdo it, it starts looking cheap instead of elegant.
Use a balanced color palette:
- Yellow + White (clean and classy)
- Yellow + Green (fresh and natural)
- Yellow + Pink (vibrant and festive)
For your background:
- Hang marigold garlands vertically
- Add a simple fabric backdrop (dupatta or curtains work fine)
- Use fairy lights behind the cloth for a glowing effect
Don’t overthink materials. Most of these things are already available at home or can be sourced cheaply from local markets.
Haldi Decoration in Khatauli – Budget-Friendly DIY Hacks
Here’s the truth: most people waste money because they chase “Instagram-perfect” setups without understanding composition.
Instead, focus on these high-impact elements:
1. Floor Setup
Use a simple mattress or wooden plank and cover it with a bright bedsheet. Add cushions for comfort and style.
2. Floral Touch
Fresh flowers are great but expensive. Mix real marigold with artificial flowers to cut cost without killing the look.
3. Props That Actually Matter
- Brass pots or steel utensils (polished)
- Small stools decorated with cloth
- Flower baskets
- Handmade “Haldi” sign using cardboard
These small details create a premium feel without spending thousands.
Haldi Decoration in Khatauli – Floral & Traditional Theme
If you want that proper wedding vibe, go traditional. This theme never fails.
What to include:
- Marigold curtains (must-have)
- Banana leaves or mango leaves for authenticity
- Clay pots and diyas
- Rangoli in front of the seating area
The trick here is placement. Don’t randomly throw decor everywhere. Keep the seating area as the focal point and design everything around it.
Also, avoid mixing too many themes. Stick to one concept and execute it properly.
Step-by-Step DIY Haldi Setup Plan
Here’s a no-nonsense process you can follow:
Step 1: Choose the Spot
Pick a corner with good natural light. Photos matter more than you think.
Step 2: Set the Background
Fix your curtain or cloth first, then add garlands and lights.
Step 3: Arrange Seating
Place a low seat or mattress in the center. Add cushions neatly—don’t clutter.
Step 4: Add Side Decor
Keep small elements like pots, baskets, or stools on the sides to balance the frame.
Step 5: Final Touch
Sprinkle flower petals, set up Haldi bowls, and check how it looks in photos before the function starts.
Common Mistakes You Should Avoid
Let’s be honest—most DIY setups fail because of poor execution, not lack of budget.
- Too many colors: Makes everything look messy
- Overcrowded decoration: Less space = less elegance
- Ignoring lighting: Bad lighting ruins photos completely
- Random props: Everything should have a purpose
If you avoid these mistakes, your setup will already look better than 80% of people.
Make It Look Premium Without Overspending
You don’t need luxury decorators to create a beautiful Haldi ceremony. What you need is:
- Clean layout
- Consistent color theme
- Smart use of space
- Balanced decoration
That’s it.
Most people complicate things. Keep it simple, and your decoration will automatically look classy.
Conclusion
A well-planned DIY Haldi setup can look just as stunning as a professionally decorated one—if not better. The key is understanding what actually matters and cutting out the unnecessary extras.